Introduction
This document provides detailed installation instructions for configuring and deploying VocBench version 2.0.
The installation package of Vocbench downloadable from its project site, which contains all or most of the components for installing VB2.0, will be referred along the guide as:
INST_PKG
When a file name for an installation component is referred in this guide without further specifying its full path, we are assuming it is in INST_PKG.
Requirements
Third Party Software
Apache Tomcat web server (version 6.0 or higher)
EXAMPLE: debian:apt-get update; apt-get install sun-java6-jdk apache2 tomcat6 libmysql-javaMySQL database server (version 5.0 or higher)
EXAMPLE:debian:apt-get install mysql-server
- Note Root password
- Add extra users for VocBench if required
- OWLIM. (you may postpone the installation of OWLIM if you want to test VocBench with a small thesaurus; we recommed however OWLIM for better reliability and larger scalability; see "Running VocBench on OWLIM SE")
Our Software
- Semantic Turkey ServerVersion; use the package found in the INST_PKG: ST-Server.zip (see installation steps)
- VocBench application war file use the package found in the INST_PKG
- VocBench OSGi bundle for ST; just use the package found in INST_PKG; (usually, it comes already ambedded inside the Semantic Turkey package, you may check it in the /extensions/service folder of the Semantic Turkey server)
Data
- Administrator Database {VB.DB.VERSION}
Installation Steps
Setting up the main Software Components
1. Semantic Turkey Server Setup
- Unzip the package ST-Server.zip in a directory of your choice
- Just make sure that you have no other copy of st-server in the same folder, or they will clash with each other.
In the directory ST-Server, there are batch files for Windows (.bat) and UNIX (.sh) to run the server.
A further integration step would ask for VocBench OSGi bundle {ST.VB-BUNDLE.VERSION} to be copied inside the ST-Server directory under folder ST-Server\extensions\service. However, the OSGi bundle already comes packed inside the ST-Server, so perform this only if you get a specific update of the OSGi bundle.
2. Import the Administrator Database SQL Dump File ({VB.DB.VERSION}) on MySQL Server
EXAMPLE: debian: mysql -u {your.db.user} -p < administrator20.sql
3. VOCBENCH Setup
- Drop the {VB.VERSION} .war file in the Tomcat webapps folder and start Tomcat
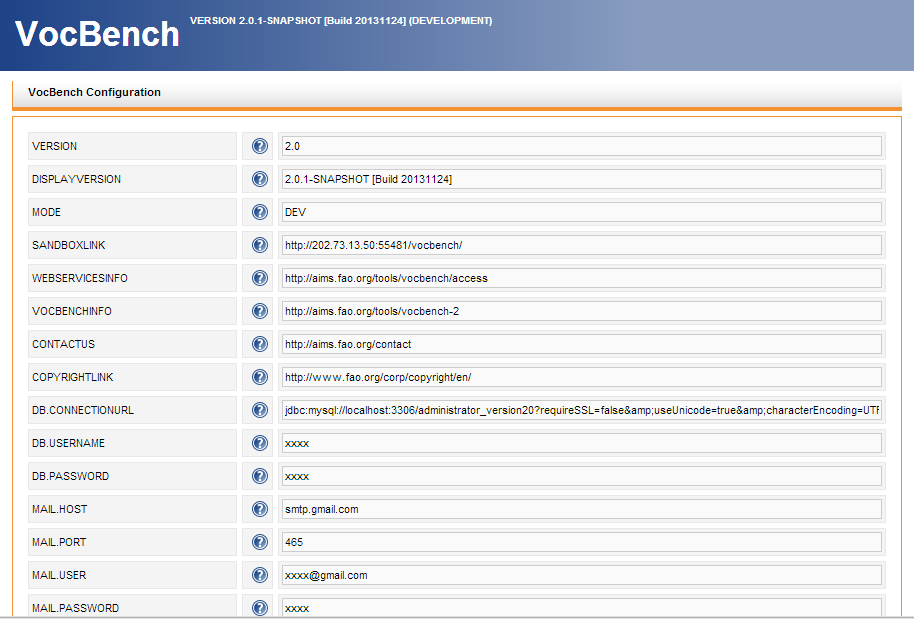
- VB allows updating your configuration file at the time of first load after installation. All properties the values of which are filled with xxxx should be mandatorily filled by the user, while the others may be kept as they are (though can be customized as well). Note that any specificity in the installation of the other tools may require changes in these properties (e.g. the DB.CONNECTIONURL may need to be changed to reflect a different port for your MySQL installation).
- See also the System Administration Guide for more information on these properties.
Running the System
Running Semantic Turkey
- Start Semantic Turkey by using the batch file in the ST-Server directory (server_run.bat for windows and server_run.sh for UNIX systems).
Running Vocbench
- Run Tomcat.
- Access VB from the browser at:
http://localhost:8080/<vocbench-deployment-name> (Change URL according to your configuration)
Example:
http://localhost:8080/vocbench-2.0
- VB has been preconfigured with administrator user. Use following credentials to connect as administrator. Administrators are the super users who can create new users and approve new users.
Administrator User Credentials:
Username: administrator
Password: 111111
In appendix A, there are specific instructions for performing some actions from behind-the-scenes, such as directly configuring a new project from the AdminDB of Vocbench, or creating the project through Semantic Turkey etc…
However, unless you experience some problem, you may follow the instructions in the next sections, which instruct the user on how to create and manage projects through the ST user interface
Project Management
The following sections instruct the user on how to create a new project
- Project Creation/Deletion
- SKOS Concept scheme Management
- Ontology Import
- Namespace Prefix Mapping Management
- Loading pre-existing data
- Enabling Indexing
1. Project creation/deletion
Create new project
- Login with the administrator privilege (Only administrator are allowed to delete the project)
- Once logged in, list of currently available project will be displayed.
- On the top right corner, click [+] button to add the project.
- Add window will be prompted to input following parameters:
- Project name
- Name of the new project (e.g. {ST.PROJECT.NAME})
- Project description
- Description of the project
- Project type
- Type of the project (OWL, SKOS, SKOS-XL)
- Only SKOS-XL is available at the moment.
- Base URI
- Specify the base URI for the project e.g. (http://aims.fao.org/aos/agrovoc/)
- Semantic Turkey Server URL
- Connection URL to Semantic Turkey Server (ST Server)
- It is assumed that ST Server has been started, if not start the server
- URL:(<serverprotocol>://<serverip>:<serverport>/<servletpath>)
- e.g:(http://127.0.0.1:1979/semantic_turkey/resources/stserver/STServer)
- Project name
- Click [Connect] button to test the connection to ST Server.
- If failed, will prompt service failed message. Check if ST Server is running and connection URL is correct.
- In case of successful connection, it will prompt list of triple Store
- OntologyManagerFactorySesame2Impl
- After triple store selection, it will prompt for available triple storage mode as follows
- In memory/persistent
- In memory/no persist
- Native store/persistent
- Remote access
- Creating a plain Sesame2 project (no OWLIM)
- select “in memory/persistent”
- You can leave the other parameter values (1000, true, true) as they are
- Continue with the instructions as in “Running the system”
Delete project
- Login with the administrator privilege (Only administrator are allowed to delete the project)
- Once logged in, list of currently available project will be displayed.
- Select the project to be deleted.
- On the top right corner, click [-] button to delete the project.
- Delete window with project name will be prompted.
- Click [Delete] button to confirm deletion.
- Delete project will be removed from the list.
2. SKOS Concept Scheme management
- After login, you will be directed to concept module.
- If no concept scheme is selected by default, you will be prompted to go to Scheme module to select concept scheme.
- Click on the [Schemes] link on the main menu bar, to go to Schemes module.
- List of available concept schemes will be displayed.
- If none of them is available, click [+] button on top right corner of list box to add new scheme.
- Add scheme window will be prompted to add following parameters:
- Scheme URI
- Scheme label
- Scheme language
- After clicking [Add] button, newly added scheme will be displayed in the list.
- To select the scheme, click on the check box.
- To delete the scheme, click [-] button on the right end of each scheme.
- Delete scheme window with scheme URI will be displayed.
- Click [Delete] button to remove the concept scheme.
- NOTE: Add/delete scheme is available only to administrator but selection of concept scheme is available to all users.
3. Ontology Import
- To import ontology, follow these link on the top menu bar
- Administration > Ontology
- Under Imports box, list of imported ontology will be displayed.
- To import ontology, click [+] button on the top right corner
- Four options are available
- Add import from web
- This option will import ontology from the web by providing following parameter
- Base URI: base uri of the ontology (e.g. http://www.w3.org/2008/05/skos-xl#)
- Alternative URI: web url for ontology file (e.g. http://www.w3.org/2009/08/skos-reference/skos-xl.rdf)
- This option will import ontology from the web by providing following parameter
- Add import from web
- Add import from local file
- This option will import ontology from the locally by providing following parameter
- Base URI: base uri of the ontology (e.g. http://www.w3.org/2008/05/skos-xl#)
- Local file : browse locally available ontology file (e.g. c:\skos-xl.rdf)
- Mirror file: Name of the ontology file to be stored in server as mirror file (e.g. skos-xl.rdf)
- This option will import ontology from the locally by providing following parameter
- Add import from local file
- Add import from web to mirror
- This option will import ontology from web and store in the server as mirror by providing following parameter
- Base URI: base uri of the ontology (e.g. http://www.w3.org/2008/05/skos-xl#)
- Mirror file: Name of the ontology file to be stored in server (e.g. skos-xl.rdf)
- Alternative URI: web url for ontology file (e.g. http://www.w3.org/2009/08/skos-reference/skos-xl.rdf)
- This option will import ontology from web and store in the server as mirror by providing following parameter
- Add import from web to mirror
- Add import from ontology mirror
- This option will import ontology from the mirror file available in the server by selecting from the list
- Add import from ontology mirror
- To delete the imported ontology, click [-] button on the right end of each ontology.
4. Namespace Prefix Mapping Management
- To manage namespace, follow these link on the top menu bar
- Administration > Ontology
- Under namespace management box, list of available namespace with their prefix will be displayed.
- To add new namespace, click [+] button on the top right corner
- Provide namespace (http://aims.fao.org/aos/agrontology#) and prefix (agro) and click [Add] button.
- To edit namespace, click [pen] button on the right end of the namespace in the list.
- Change namespace prefix and click [Edit] button.
- To delete namespace, click [-] button on the right end of the namespace in the list.
- Delete namespace window will be prompted with namespace and prefix.
- Click [Delete] button to delete the namespace.
5. Loading pre-existing data
- To load RDF data, click on the [Load data] link in the main menu bar.
- Input following parameter
- Base URI: base uri of the data to be imported. (e.g. http://aims.fao.org/aos/agrovoc/)
- RDF file: browser data file to be imported. (e.g. agrovoc_wb_20130507_VB.nt)
- Click [Import button] to import data.
- This process may take some time depending on the size of the data.
6. Enabling indexing
- To enable indexing, click on [Advanced search] link below top menu bar at the top right end.
- Click on the [index] button at the right end.
- It will prompt to confirm if you want to index. Click the [Ok] button to enable indexing.
- This process may take some time.
- This action is only available to administrator users.
Creating a new User
We suppose here that you are both the user and administrator of vocbench (see section 4 on VOCBENCH setup).
To add a new user in VocBench follow these steps:
- Go to http://localhost:8080/vocbench-2.0/index.html and click on "Create an account" under the login form on the right of the page
- Input all the required information. It is better, even if it is not mandatory, to specify the "Languages you wish to manage" and the "Ontology you wish to manage"
- At this point the account is not yet allowed to log on.
- As a user, you can wait for the confirmation email that a request has been sent to the administrator
- As administrator, you can wait for the email and follow its instructions
If you do not receive any email (maybe a misplaced configuration) you need to manually enable the account by modifying the admin DB (see FAQ 1)
There is a list of Frequently Asked Questions (FAQs) addressing specific issues related to installation